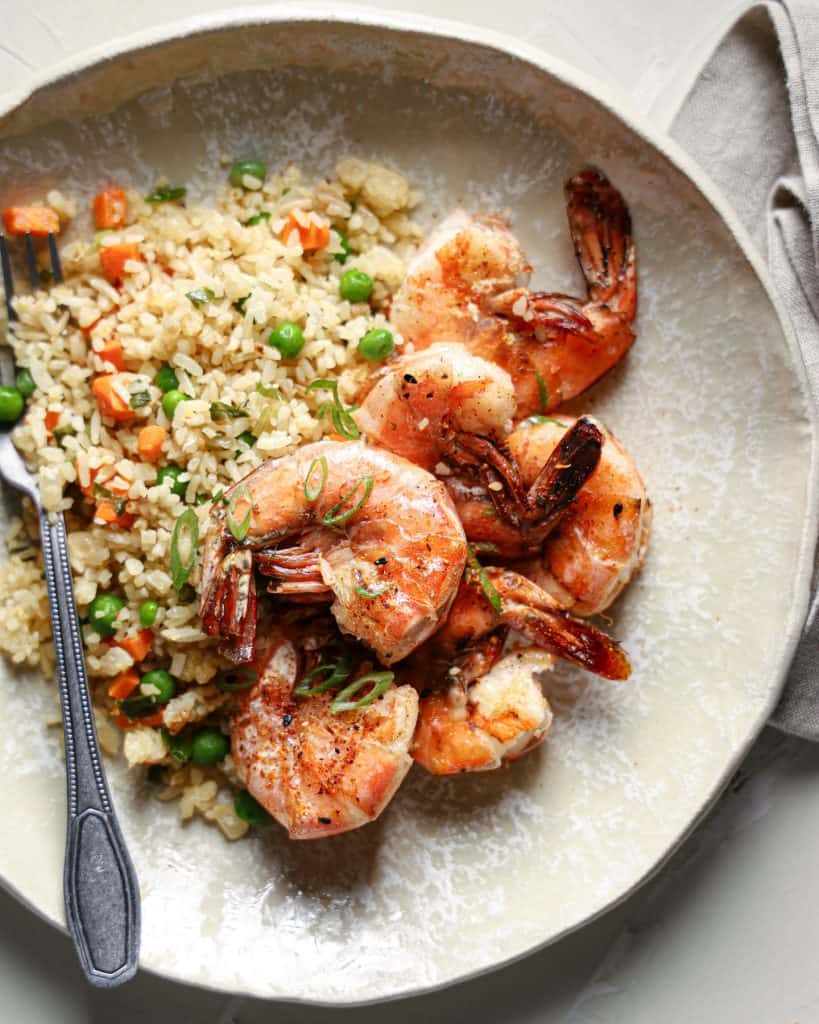
A classic recipe for shrimp fried rice with fresh shrimp, green onions, carrots, peas and sesame oil.
*This post is sponsored by Vermicular but all opinions expressed are genuine.

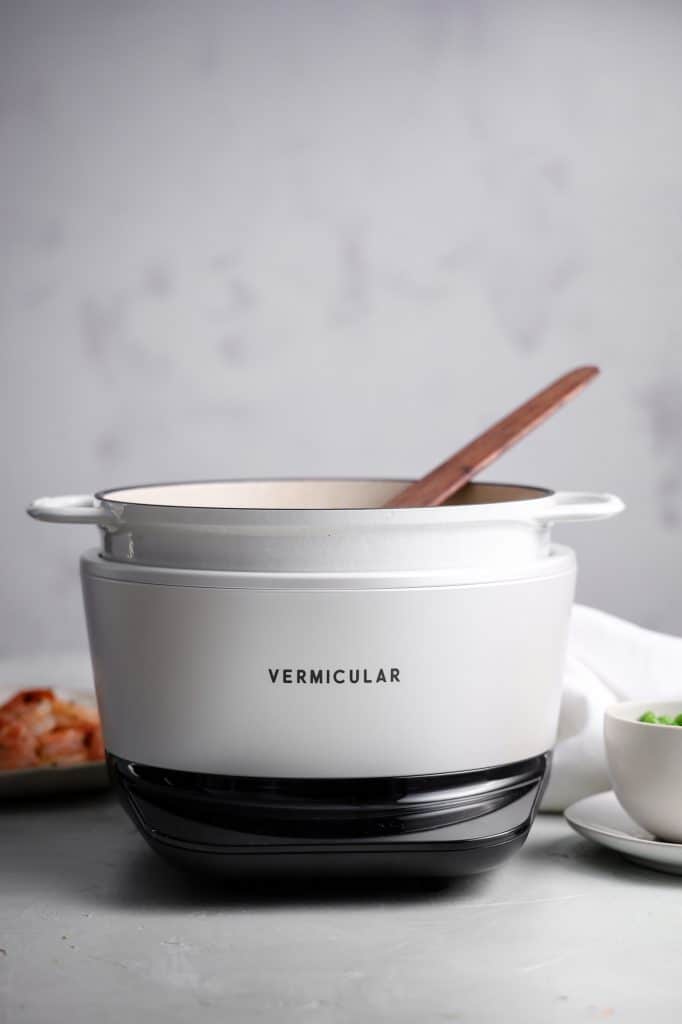
The Musui–Kamado
When the folks at Vermicular reached out about collaborating on a recipe for their Musui–Kamado, I had no idea that I would fall in love with this new device. At the risk of sounding dramatic, it has ignited a new excitement for cooking…and you know I already spend plenty of time in the kitchen.
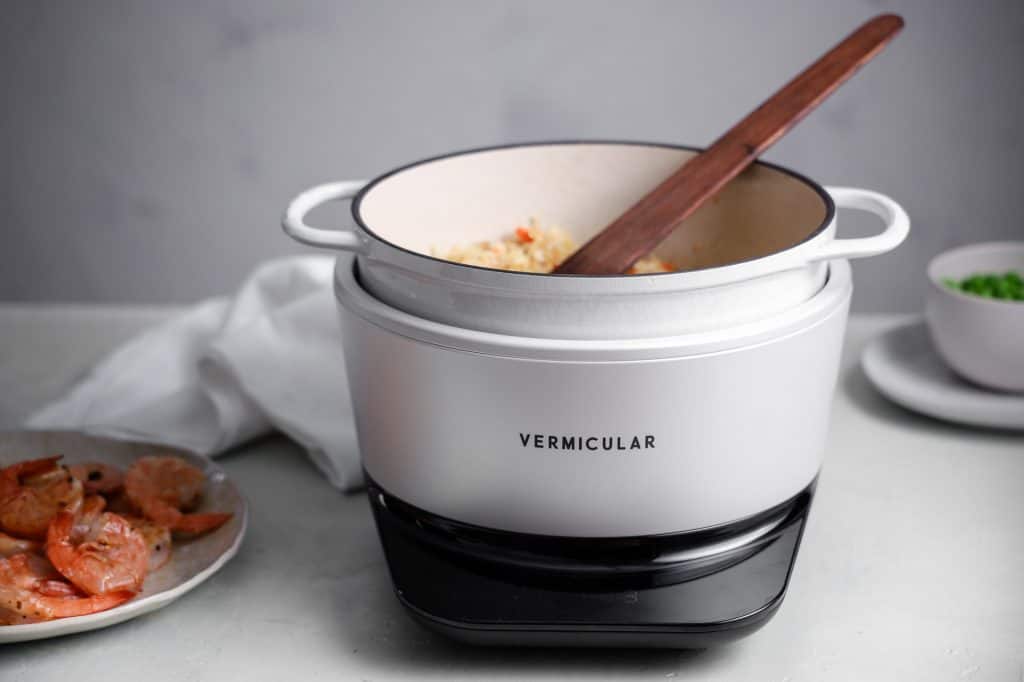
“Precision” is the word that comes to mind when thinking of the Musui–Kamado, , Vermicular’s cast iron induction cooker.
The Musui is a cast-iron pot with a perfectly machined lid that creates a precision seal. This means you can maintain a constant and even cooking temperature with their enameled cast iron pot while the seal helps to retain the moisture in your ingredients through the cooking process. Chicken will never be dry again with the Musui–Kamado in my kitchen.
The Kamado is the induction device that the Musui sits in. It heats both the base and the sides of the Musui further ensuring total cooking consistency. Too, it can be adjusted to a specific degree between 90-200ºF promising a perfect cook on more temperamental ingredients. For example, I prepared bread with the Musui–Kamado and got a perfect rise in the dough thanks to a 90ºF temperature. Or get a caramelized sear on your steaks at Medium heat (445ºF)
Given all of these advantages, shrimp fried rice instantly came to mind as a recipe to prepare in the Musui–Kamado. Most western stovetops struggle to give consistent results for the frying part of the “fried rice”. You need a constant high temperature to give the signature crispiness that I love in my favorite restaurant fried rice. Too, shrimp is highly temperamental, so it was wonderful to cook them with the Musui–Kamado’s precise temperatures.
The Rice
Obviously, well-prepared rice goes a long way in making excellent fried rice. The Musui–Kamado comes with a rice and water measuring cup to ensure you get the proper rice to water ratio. Next you set the type of rice and desired doneness on the Kamado and it completes the cooking process.
One thing to bear in mind is that this method of cooking is not about speed. It’s about perfection. Cooking rice takes approximately one hour, accounting for a 30 minute soaking period and 30 minute cooking period. But, the wait is well worth it for perfect rice.
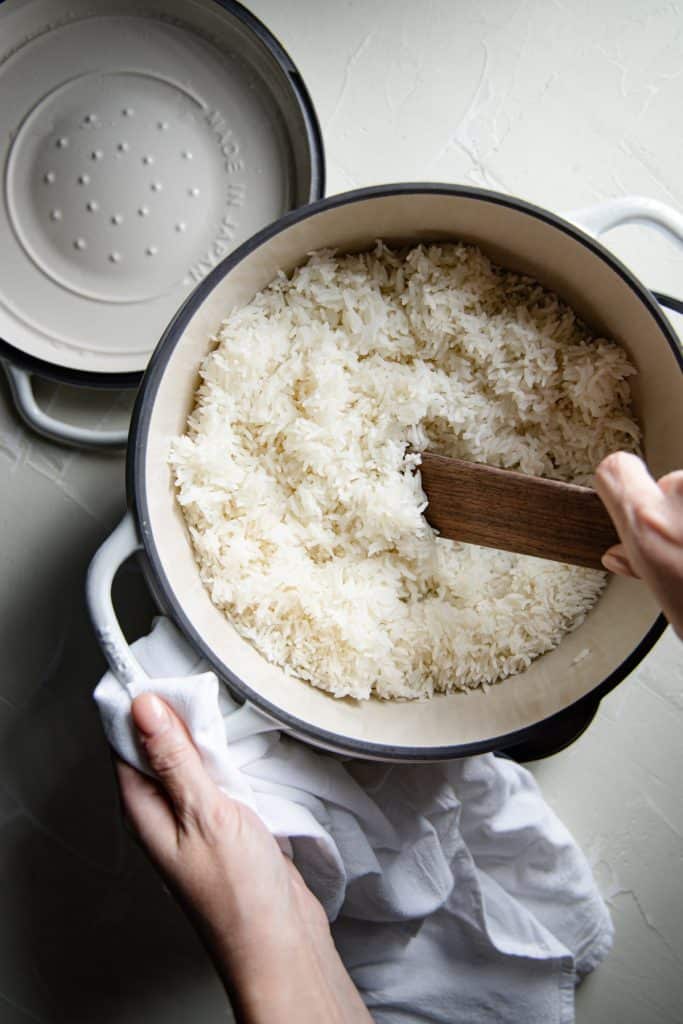
Many recipes for fried rice suggest using leftover chilled rice so that it doesn’t clump up. But, you can have great results with freshly cooked rice as long as you make sure to rinse it prior to cooking. I also toss it with 1 Tbs of oil prior to frying to help keep grains from clumping.

The Shrimp
There is an ongoing debate in our house of shells-on vs shells-off. Ryan has no patience for fussy food and prefers his shrimp shells off. I’m all about flavor and aesthetic, so I go shells on. Either way, the trick is to not over-cook your shrimp. Overcooked shrimp is rubbery.
You have the option of precision cooking the shrimp with the Musui-Kamado to get the exact temperature of 135ºF. Precision cooking will ensure the perfect texture for buttery, tender shrimp.
Not everyone loves seafood. If you’re opposed to shrimp, feel free to substitute chicken, beef, tofu, or just the basic fried rice.
Just promise me you won’t skip the egg. The egg is my favorite part.
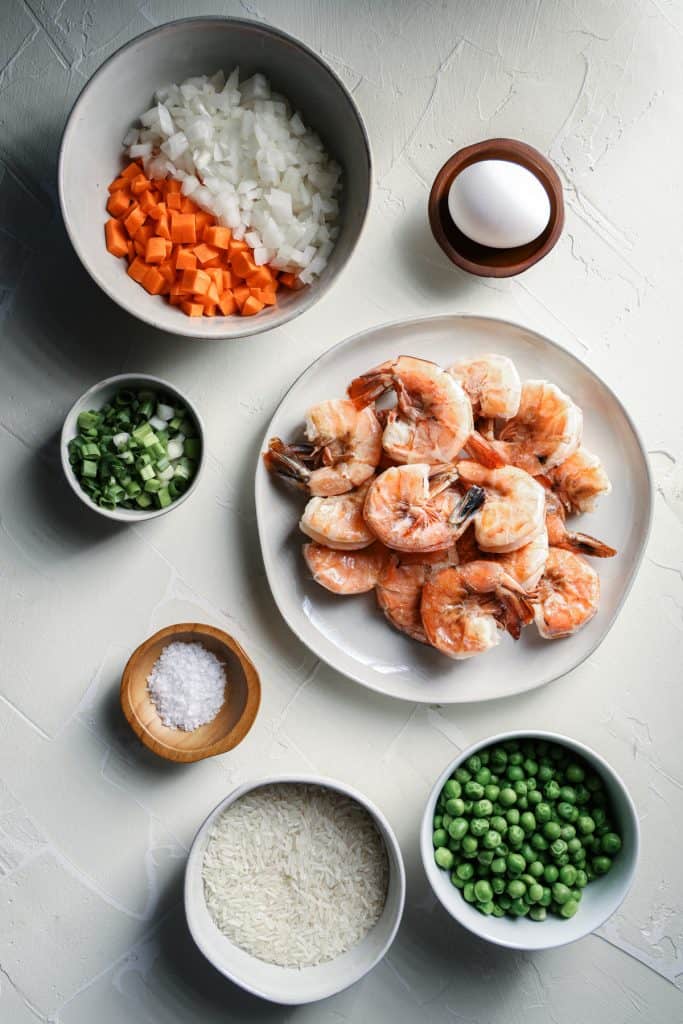
Mise en place
Make sure you have all of your ingredients prepped, measured and ready to go once you are ready to make the fried rice. The steps move quickly, so having your “mise en place” prepared is very helpful.
If you are not working with the Musui–Kamado and using a regular stove-top, you will want to fry the rice in batches. Adding the rice to a pot on the stove will cause the pot’s temperature to go down. This prevents you from maintaining the high heat needed to crisp up and toast the rice effectively. If you work in batches, you will lose less heat.
The nice thing about the Musui–Kamado is it has a built-in heat sensor that maintains heat levels for you. As you add ingredients, the Musui–Kamado will regulate and maintain the heat you need so that your fried rice turns out perfectly every time.
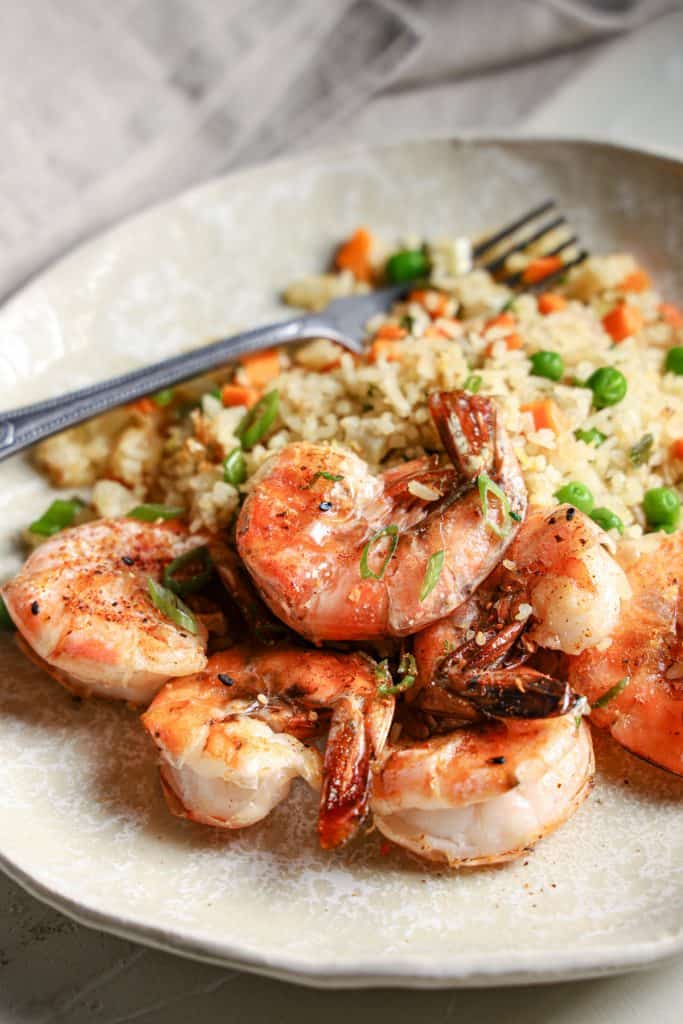
The Final Dish
I enjoy making fried rice at home because I can regulate the amount of oil and seasoning, giving me a healthier version of one of my favorite foods.
I was thrilled at how easy it was to prepare this recipe in the Musui–Kamado. The final result was a crispy, evenly-cooked rice with tender vegetables and buttery shrimp. The flavor and texture is just like fried rice prepared in a wok, but with the Musui–Kamado you can know you are working at the right temperature throughout the entire process with simply the touch of a button.
This new addition to my kitchen has opened up new possibilities and has ignited an excitement for cooking that I haven’t experienced with other cookware and appliances before.

Shrimp Fried Rice
- Total Time: 100 min
- Yield: 4 servings 1x
Description
A classic recipe for shrimp fried rice with fresh shrimp, green onions, carrots, peas and sesame oil.
Ingredients
- 1 cup white jasmine rice
- 1.05 cups water
- 4 Tbs sesame oil (separated into 1 Tbs increments)
- 12 raw large to jumbo shrimp (peels on or off based on your preference)
- 1/2 medium onion minced
- 1 medium carrot small diced
- 2 scallions, small diced
- 1 tsp rice wine vinegar
- 2 tsp soy sauce
- 1 large egg
- 1 cup frozen peas
- salt and pepper to taste
Instructions
- Prepare 1 cup of uncooked white jasmine rice with water according to package directions. If using the Musui–Kamado, measure using the rice cup and the water cup to the 1 cup levels. Select [WHT] rice, [NORM] finish, [1.0] cups, and press start.
- Once the rice is cooked, place it in a bowl and toss it with 1 Tablespoon sesame oil so as to help prevent clumping
- Preheat the pot on the [MED] setting. Once the [GRILL OK] sign appears, spread the oil evenly and sear the shrimp in an even layer and cook, stirring and turning shrimp occasionally, until pink, approx. 2 minutes. If using a stove top, heat the pot over medium high heat. Once cooked, remove the shrimp to another bowl or plate and cover until ready to serve.
- Next, continuing on the [MED] setting, add in 1 Tablespoon of sesame oil and then add in the prepared rice, stirring frequently for three to five minutes so that the rice is lightly toasted and slightly chewy. If you are on a stovetop, complete this step in batches to ensure toasting.
- Next, press the rice up against the sides of the pot and add in the diced onion, carrot and scallions to the center of the pot and sauté until fragrant (approx. 1 minute) then stir together with the rice in the pot and add in the 1 tsp of rice wine vinegar and 2 tsp of soy sauce and toss to combine.
- Press all of the rice and vegetables back up along the sides of the pot and add in the remaining 1 Tablespoon of oil to the center. Then break the egg into the oil in the center and using your spatula, scramble the egg.
- Once the egg is in small bits, toss it together with the rice and vegetables.
- Finally, add in the 1 cup of peas and toss to combine. It’s important to add the peas at the end so that they retain their vibrant green color and don’t get overcooked. You just want them warmed through.
- Season with salt and pepper to taste.
- Serve the rice topped with the cooked shrimp and enjoy!
Notes
- Shrimp can be substituted for chicken, beef, or tofu.
- You can use leftover rice that has been refrigerated. Just make sure that all clumps of rice are broken up so you’re frying separated grains.
- Prep Time: 25
- Cook Time: 75 min
- Category: Main Dish
- Method: Saute
- Cuisine: Asian
